Crafting Depth: 3D House Laser Cut Decor
The intersection of digital precision and tactile artistry has opened new avenues for interior design, allowing creators to transform flat materials into striking three-dimensional narratives. 3D House Laser Cut. Home Decor represents more than just a trend; it is a versatile medium that bridges the gap between architectural modeling and functional wall art. Whether you are a seasoned maker with a workshop full of tools or a hobbyist looking to add a personal touch to your living space, understanding the nuances of this craft can elevate your projects from simple cutouts to sophisticated design statements.
At its core, this approach relies on layering. By stacking multiple sheets of material, typically wood or acrylic, designers create depth, shadow, and perspective that a single-layer cut simply cannot achieve. The result is a piece that changes character depending on the lighting and the viewer’s angle, adding a dynamic quality to static home environments. This method is particularly effective for depicting complex structures like houses, cityscapes, or intricate geometric patterns where dimensionality enhances the visual impact.
The Versatility of Digital File Formats
One of the most significant advantages of purchasing digital designs for laser cutting is the immediate accessibility and compatibility across various machines. A comprehensive package for 3D House Laser Cut. Home Decor typically includes a zip folder containing designs in SVG, DXF, EPS, PDF, JPEG, and PNG file formats. This diversity ensures that regardless of your software preference—whether you use Adobe Illustrator, CorelDRAW, Inkscape, or proprietary machine software—you can import the files without conversion headaches.
- SVG and DXF: Ideal for vector-based editing, allowing you to resize designs without losing quality and adjust cut paths for specific machine requirements.
- EPS and PDF: Perfect for high-quality printing or sharing with clients who need to view the design layout before production.
- JPEG and PNG: Useful for previewing the final look, creating marketing materials, or using as reference images during the assembly process.
This flexibility empowers entrepreneurs and educators alike. For instance, a teacher might use the PNG files to show students the expected outcome before handing out the DXF files for them to manipulate in a CAD program. Similarly, a small business owner can use the high-resolution images for social media promotion while keeping the vector files ready for production.
Material Considerations and Precision
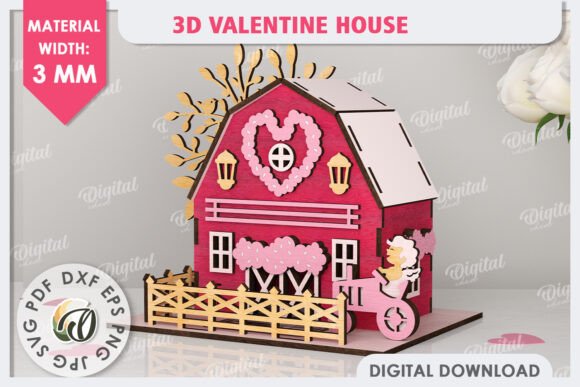
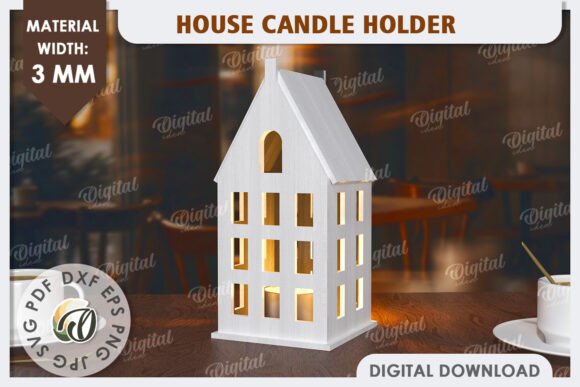
While the digital file provides the blueprint, the physical material brings the design to life. For most 3D House Laser Cut. Home Decor projects, the required material width is 3mm. This specific thickness is not arbitrary; it strikes a balance between structural integrity and aesthetic delicacy. Thinner materials may warp or lack the necessary depth for a convincing 3D effect, while thicker materials can make the layers appear bulky and obscure fine details.
Birch plywood is a popular choice for these projects due to its consistent density and clean cut edges. However, acrylics and MDF are also viable options depending on the desired finish. When working with 3mm material, it is crucial to account for the kerf—the width of the material burned away by the laser. High-quality designs often compensate for this, but understanding how your specific machine interacts with the material is key to achieving a snug fit between layers. A loose fit can compromise the structural stability of the house model, while a fit that is too tight can cause warping or breakage during assembly.
Applications Beyond the Living Room
The utility of these designs extends far beyond personal home decoration. In professional settings, 3D House Laser Cut. Home Decor serves as an excellent tool for branding and environmental design. Real estate agencies, for example, can use customized laser-cut house models as unique closing gifts for clients or as eye-catching displays in open houses. These tangible items create a lasting impression that digital brochures simply cannot match.
In educational environments, these projects offer hands-on learning opportunities. Students can explore concepts of geometry, architecture, and engineering by assembling the layered components. The process encourages spatial reasoning and patience, as each layer must be aligned precisely to maintain the integrity of the overall structure. For makerspaces and community workshops, providing pre-designed files allows participants to focus on the assembly and finishing techniques, such as sanding, staining, or painting, rather than spending hours on complex vector design.
Enhancing Brand Identity and Engagement
For marketers and content creators, incorporating physical, handcrafted elements into digital campaigns can significantly boost engagement. A time-lapse video of assembling a 3D House Laser Cut. Home Decor piece is highly shareable content that showcases craftsmanship and attention to detail. It humanizes a brand, suggesting values of quality and creativity. Furthermore, offering these designs as part of a product line allows businesses to tap into the growing DIY market, catering to customers who value personalized, handmade items over mass-produced goods.
The possibilities of creation are indeed endless. You might choose to leave the natural wood grain visible for a rustic, organic feel, or paint each layer in contrasting colors to highlight the architectural details. Some creators integrate LED lighting behind the layers, turning the house into a glowing nightlight that casts intricate shadows on the surrounding walls. This adaptation transforms a decorative object into a functional light fixture, adding warmth and ambiance to any room.
Practical Tips for Success
To ensure the best results when working with these designs, consider the following recommendations:
- Test Cuts: Always perform a test cut on a scrap piece of your chosen material to verify power and speed settings. This prevents waste and ensures clean edges.
- Layer Organization: Keep your layers organized during assembly. Labeling them or following a numbered sequence can prevent confusion, especially in complex designs with many similar-looking pieces.
- Adhesive Selection: Use a strong, clear-drying adhesive suitable for your material. Wood glue works well for plywood, while specialized acrylic cement is necessary for plastic layers.
- Finishing Touches: Sand any rough edges lightly before assembly to ensure a smooth finish. Consider applying a sealant or varnish to protect the wood and enhance its natural beauty.
Thank you for visiting my store. We are committed to providing high-quality, ready-to-cut designs that inspire creativity and simplify the making process. If you have a question about file compatibility, material recommendations, or customization options, please write me a message. I am happy to assist you in bringing your vision to life. Happy shopping, and may your creations bring joy and beauty to your space.