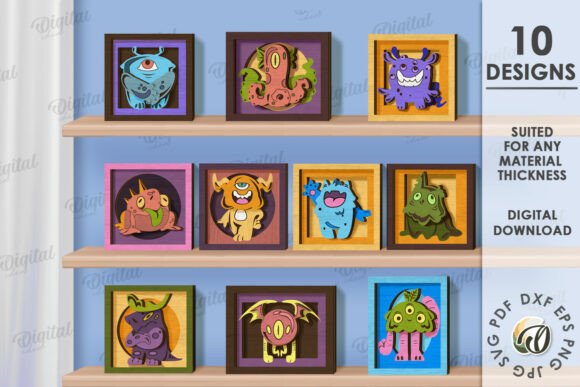
Mastering the 3D Fridge Reminder Magnet Laser Cut: A Digital Creator’s Guide
In the bustling world of digital crafting, few items offer as much functional charm as a 3D Fridge Reminder Magnet Laser Cut. These layered designs transform ordinary kitchen appliances into organized hubs for notes, grocery lists, and family schedules. However, there is a critical distinction that often trips up new buyers and seasoned crafters alike: understanding exactly what you are purchasing. When you browse listings for these intricate designs, it is vital to recognize that you are acquiring a digital blueprint, not a physical object. This subtle difference changes how you approach the project, from file preparation to material selection.
The appeal of a laser-cut reminder magnet lies in its depth and utility. By layering acrylic, wood, or cardstock, creators achieve a tactile, three-dimensional effect that flat stickers simply cannot match. Yet, the journey from downloading a file to holding a finished product is fraught with potential pitfalls. Many enthusiasts rush into production without fully vetting their digital assets, leading to wasted materials and frustration. Let us explore the common misunderstandings surrounding these digital files and how you can navigate them with confidence and precision.
The Digital Nature of the Product
The most frequent source of confusion stems from the expectation of receiving a tangible item. When you purchase a 3D Fridge Reminder Magnet Laser Cut design, you are buying intellectual property and technical data. The zip folder attached to your purchase contains the raw data needed to instruct your laser cutter or CNC machine. It typically includes formats such as SVG, DXF, EPS, PDF, JPEG, and PNG. Each format serves a specific purpose, and misunderstanding their roles can halt your workflow before it begins.
For instance, relying solely on the JPEG or PNG files for cutting is a significant error. These raster images are excellent for visual reference or printing labels, but they lack the vector paths required for precise laser cutting. If you attempt to cut using a pixel-based image, your machine may interpret edges poorly, resulting in jagged lines or incomplete cuts. Always prioritize the SVG or DXF files for your cutting software. These vector formats ensure that every curve and corner is mathematically defined, allowing your laser to follow the path with exactitude. Before you even power on your machine, take a moment to open the SVG file in your preferred design software to verify that all nodes are connected and paths are closed.
Material Selection and Layering Logic
Once you have mastered the file formats, the next challenge is material compatibility. A design labeled as "3D" implies multiple layers that stack upon one another. A common mistake is assuming that any thickness of material will work. In reality, the designer has calculated specific tolerances based on standard material thicknesses, usually around 3mm or 1/8 inch. If you substitute a thicker material without adjusting the design, the layers will not fit together properly. The magnets may not sit flush, or the text might become obscured by the overlapping pieces.
To avoid this, always check the design specifications provided in the accompanying PDF or description. If you wish to use a different material thickness, you must scale the vector files accordingly. This requires a basic understanding of proportional scaling in your design software. Furthermore, consider the weight of your chosen materials. A fridge magnet must be light enough to adhere securely but heavy enough to feel substantial. Using dense hardwoods for every layer might make the final product too heavy for standard adhesive magnets, causing it to slide down the refrigerator door. A balanced approach, perhaps combining lightweight acrylic for the base with thinner wood for the top details, often yields the best results.
Precision in Assembly and Adhesion
Even with perfect cuts and appropriate materials, poor assembly can ruin the aesthetic of your 3D Fridge Reminder Magnet Laser Cut. Many beginners make the error of applying glue generously, not realizing that excess adhesive can seep out between layers, creating unsightly blobs that are difficult to remove once dried. This not only detracts from the clean, professional look of the piece but can also interfere with the magnetic backing.
A better approach is to use precise, minimal amounts of high-quality cyanoacrylate glue or double-sided adhesive tape designed for crafts. Apply small dots at key structural points rather than coating entire surfaces. Additionally, ensure that the surface of your fridge or metal board is clean and dry before attaching the magnet. Dust and grease can significantly reduce the holding power of even the strongest neodymium magnets. For those creating these items for sale, consider adding a protective film to acrylic pieces before assembly to prevent scratches during handling, removing it only after the final polish.
Customization and Endless Possibilities
One of the greatest advantages of buying a digital design is the ability to customize. However, some users hesitate to modify the files, fearing they will break the design integrity. On the contrary, slight adjustments can make the product uniquely yours. You might want to change the font of the reminder text or adjust the size to fit a specific space. Since you receive editable vector files, you have the freedom to tweak these elements. Just remember to maintain the aspect ratio when resizing to prevent distortion.
For educators and small business owners, this flexibility is invaluable. You can create themed sets for different seasons or holidays by simply changing the color palette of the materials used. Imagine a pastel-themed set for spring or bold, primary colors for a classroom environment. The possibilities are truly endless, limited only by your creativity and material availability. By mastering the digital file, you unlock a versatile tool for personal expression or commercial product lines.
Final Checks Before Production
Before committing to a full production run, always perform a test cut. Use scrap material to verify that the dimensions are correct and that the layers align as expected. This small step can save you from wasting expensive materials on a flawed batch. Check the fit of the magnets within their designated slots; they should sit snugly without requiring excessive force. If the fit is too tight, you may need to slightly offset the cut path in your software to account for the kerf, or width of the laser beam.
In conclusion, creating a 3D Fridge Reminder Magnet Laser Cut is a rewarding project that blends digital precision with tactile craftsmanship. By understanding the nature of digital products, respecting file formats, choosing materials wisely, and assembling with care, you can avoid common pitfalls and produce high-quality results. Whether you are decorating your own home or building a product line for your small business, attention to detail is key. If you encounter any issues with file compatibility or have questions about specific design elements, do not hesitate to reach out to the designer. Clear communication ensures that your creative vision translates seamlessly from screen to reality. Happy shopping and happy creating.