Mastering the Art of Bear 3D Layered Paper Cut Design
The resurgence of tactile, handmade aesthetics in a digital world has brought renewed attention to the intricate craft of paper cutting. Among the various styles gaining popularity, the Bear 3D Layered Paper Cut stands out as a sophisticated blend of traditional craftsmanship and modern digital precision. This art form transforms flat sheets of paper into dimensional shadow boxes that capture depth, light, and narrative in a single frame. For creators, hobbyists, and interior design enthusiasts, understanding the mechanics and potential of this medium opens up a vast landscape of creative possibilities.
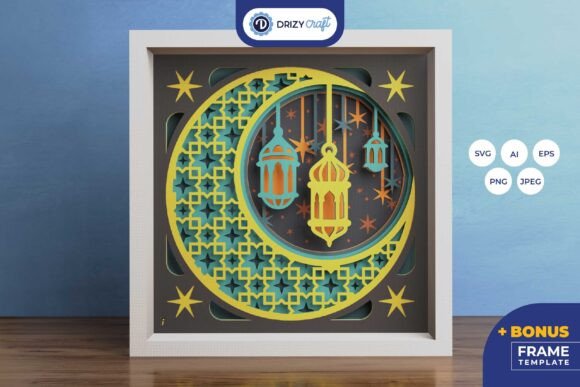
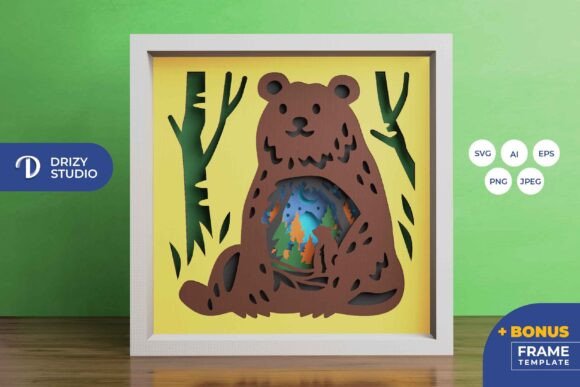
At its core, this technique involves stacking multiple layers of cut paper to create a parallax effect. When applied to nature-themed subjects, such as the Bear in The Nature 3D SVG template, the result is a immersive scene that draws the viewer in. The interplay of shadows between the layers adds a dynamic quality that changes depending on the viewing angle and lighting conditions. This is not merely a static image; it is a constructed environment that invites contemplation and appreciation of detail.
The Technical Foundation of Layered Shadow Boxes
Creating a successful 3D paper cut requires a solid understanding of both design software and physical assembly. The process begins with a digital template, typically provided in vector formats such as AI, EPS, or SVG. These formats are crucial because they allow for infinite scalability without loss of quality. For instance, a standard template might be sized at 714 x 714 pixels for digital preview, but the vector data ensures that when resized for a larger wall decoration, the cut lines remain crisp and precise.
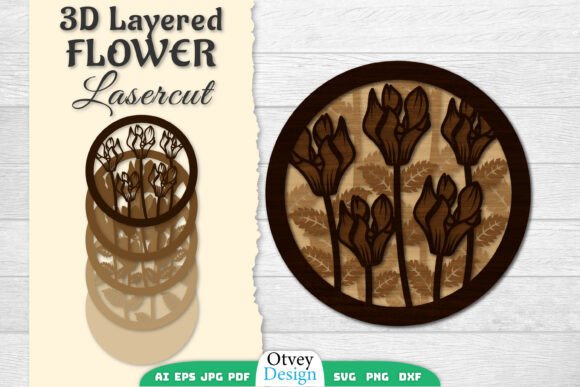
The Bear 3D Layered Paper Cut template usually consists of several distinct layers, often seven or more, each representing a different plane of depth. The foreground might feature detailed elements like foliage or the bear itself, while the background layers depict distant trees, mountains, or sky. This separation is what creates the illusion of three-dimensionality. When using cutting machines like Silhouette or Cricut, the SVG file is imported directly, allowing the machine to follow the vector paths accurately. For those who prefer manual crafting, high-resolution PNG or JPEG files can serve as guides for using art knives and scissors, though this requires a steadier hand and more time.
One critical technical consideration is maintaining the aspect ratio during resizing. If the proportions are altered, the alignment of the layers will fail, resulting in a disjointed final product. Therefore, whether you are scaling the design down for a small gift or up for a large statement piece, the width-to-height ratio must remain constant. This ensures that every element fits perfectly within the frame, preserving the intended visual harmony.
Material Selection and Assembly Techniques
The choice of paper significantly impacts the final aesthetic of the shadow box. Cardstock is the most common material due to its rigidity and ability to hold its shape under the weight of upper layers. The weight of the paper, measured in grams per square meter (gsm), should be balanced; too thin, and the layers may warp or tear; too thick, and the subtle details of the cut may be lost. Typically, papers ranging from 160 to 250 gsm provide the ideal balance for a project of this size, such as the 20.32×20.32 cm format often used for these designs.
Assembly requires patience and precision. Spacers are essential to create the physical distance between layers. These can be made from foam tape, cardboard strips, or specialized 3D mounting pads. The thickness of the spacer determines the depth of the shadow effect. For a Bear in The Nature scene, varying the spacing can enhance the perception of distance, making the background appear further away than it physically is. Adhesives such as double-sided tape or glue dots are preferred over liquid glue, which can cause the paper to wrinkle or buckle.
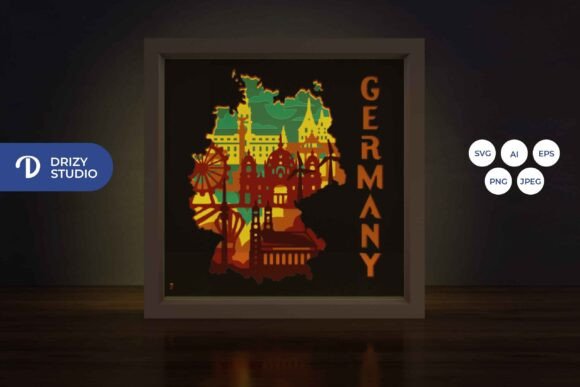
Lighting plays a transformative role in the presentation of layered paper art. While natural light highlights the texture and color of the paper, artificial lighting can dramatize the shadows. Incorporating LED strips between the layers turns the shadow box into a lightbox, casting a warm glow that accentuates the silhouettes. This modification is particularly effective for evening display, creating a cozy and inviting ambiance in any room. The light filters through the gaps in the cutouts, creating a soft, ethereal effect that enhances the natural theme of the bear and its surroundings.
Creative Applications and Customization
The versatility of the Bear 3D Layered Paper Cut extends beyond simple wall decoration. Its modular nature allows for extensive customization, making it suitable for a wide range of applications. For educators, it serves as an excellent tool for teaching geometry, spatial awareness, and art history. Students can learn about layering, perspective, and the physics of light by assembling these kits. The process encourages fine motor skill development and attention to detail, valuable traits for learners of all ages.
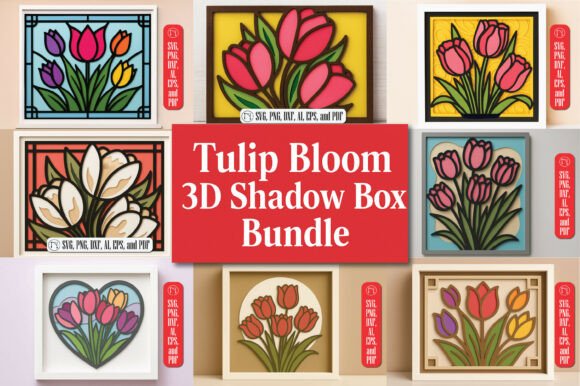
In the realm of interior design, these shadow boxes act as unique focal points. They can be tailored to match specific color palettes by selecting paper stocks in complementary hues. A monochromatic scheme using various shades of green and brown can evoke a serene forest atmosphere, while bold, contrasting colors can create a more modern, graphic look. The square format of the template lends itself well to grid arrangements, where multiple shadow boxes are hung together to create a larger gallery wall.
For gift-giving, a handmade shadow box carries significant emotional weight. It represents time, effort, and thoughtfulness. Whether for a birthday, anniversary, or housewarming, a Bear in The Nature 3D SVG project can be personalized with specific colors or additional elements. The recipient receives not just an object, but an experience—the knowledge that someone crafted this piece by hand. This personal touch elevates the gift above mass-produced items, making it a cherished keepsake.
Digital Tools and Workflow Efficiency
The integration of digital tools has streamlined the creation process, making it accessible to beginners while offering advanced features for professionals. Software compatible with SVG files allows users to preview the layers before cutting, enabling adjustments to color and placement. This digital rehearsal minimizes errors and waste, ensuring that each cut is intentional. Furthermore, the availability of templates in multiple formats—AI for Adobe Illustrator users, EPS for general vector editing, and SVG for cutting machines—ensures compatibility across different workflows.
When working with these digital assets, it is important to organize the layers logically within the software. Naming each layer according to its position in the stack (e.g., Layer 1 Foreground, Layer 7 Background) simplifies the assembly process. This organizational habit reduces confusion during the physical build, especially when dealing with complex designs with many small details. Additionally, keeping a backup of the original file ensures that any accidental modifications can be easily reversed.
The resolution of preview images, such as the 3000 x 2000 px JPEG provided for reference, offers a clear indication of the final outcome. However, creators should remember that screen colors may differ from printed paper colors due to lighting sources and monitor calibration. Therefore, it is advisable to test cut a small section or use paper swatches to verify color accuracy before committing to the full project. This step prevents disappointment and ensures that the final product meets expectations.
Preserving and Displaying Your Artwork
Once assembled, proper preservation ensures the longevity of the paper cut. Exposure to direct sunlight can cause fading over time, so placing the shadow box in indirect light is recommended. Using UV-protective glass or acrylic in the frame can further mitigate this risk. Dust accumulation can also obscure the intricate details, so regular gentle cleaning with a soft brush or compressed air is necessary. Avoiding humid environments prevents the paper from warping or developing mold.
Framing choices should complement the depth of the artwork. Deep-set frames, specifically designed for shadow boxes, provide the necessary clearance for the layered structure. Standard picture frames are often too shallow and may crush the layers, ruining the 3D effect. The frame acts as a window into the scene, so its style should enhance rather than distract from the paper cut. Simple, clean lines often work best, allowing the complexity of the bear and nature scene to take center stage.
Ultimately, the Bear 3D Layered Paper Cut represents a harmonious fusion of technology and tradition. It leverages modern digital precision to facilitate a timeless craft, resulting in artwork that is both visually striking and emotionally resonant. Whether used for educational purposes, home decor, or personal expression, this medium offers endless opportunities for creativity and innovation. By mastering the techniques of layering, lighting, and assembly, creators can produce pieces that captivate viewers and stand as testaments to the enduring beauty of paper art.